The latest YouTube editor function-face blurring effect has enjoyed favor. A while back, Matt wrote an article about the 2010 YouTube Video Editor, and although it doesn’t seem that long ago, a lot has changed. Back then, it had a few basic features, but in all honesty, it just wasn’t really that functional. However, two years later, it’s high time to revisit the video web app. Everyone deserves a second chance, right?
First off, I’ll say this – the YouTube video editor is functional, to some extent. As with anything, there are different aspects when it comes to hitting a target audience, so let’s just say you won’t be cutting the next Academy Award winner (or maybe you’re one of those avant-garde artists who will use nothing but an iPhone and the YouTube Video Editor to create the most revolutionary work ever made). However, the app is definitely worth checking out regardless of whether you plan on using it regularly or not.
The Editor
Back when we first took a look at the YouTube Video Editor, we saw that it included some standard functions: cropping video, video splicing (a must), and Audioswap. However, the new video editor does a little bit more, but before I begin, I just want to just mention that splicing is about the only thing that is the same. Realistically, you can’t change that much.
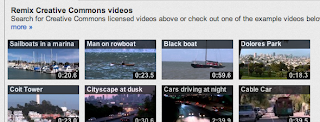
With the editor, you can put any clips you have uploaded into one big video. This is ideal for family vacation videos taken with iPhones. If you are already uploading goofy little clips of your family online, why not put them in one home movie? Seems reasonable to me. Additionally, there is a Creative Commons video library so that you can insert stock footage into your own videos. I’m not entirely sure what you would use this for, but I’m sure you could make some nifty stuff with it.
Other stuff that you can use (that would be found on any standard movie editor) include actual titles and some (corny) transitions. Furthermore, the Audioswap song selection is still around, but it looks a lot more user-friendly.
The Enhancements
What was lacking with the earlier version of the YouTube Video Editor were Enhancements. Although not actually part of the editor, the Enhancement section of YouTube provides several ways to alter the look of your video or adjust the audio. Although they aren’t the most professional tools, they are still pretty great for what they are.
The Enhancement section can be found in the video manager section of your channel through any of your videos, and its content is divided into three categories: quick fix, effects, and audio. The quick fix includes basic adjustments for issues such as contrast and even saturation. As for the effects, there are many different methods of color grading available. Also, the audio is pretty much the same as the one you would find in the editor.
All in all, the one thing that really stands out with me concerning these Enhancements is the implementations of a video stabilizer. As you may know, a lot of the video content on YouTube is shot on tiny, handheld, shaky smartphones. With the stabilizer, there is actually a chance of getting some smooth video. Just pop your shaky video into the stabilizer, and YouTube should do the rest.
From makeuseof


Secret method increase YouTube video views
ReplyDeleteMoslty Successful YouTubers are following this method 👇
increase YouTube video views
Follow my social networks for funny memes and odd news
Facebook page 👇
follow Facebook page
Twitter👇
Join Twitter
Telegram👇
Join Telegram
Once you download YouTube videos, you can use kinemaster to edit those videos. To know morejust follow all these steps.
ReplyDelete