Tuesday, July 31, 2012

Top 4 iOS Online Video Editors for Olympic Videos

Day 5 of London 2012 Olympic Games, you probably have shot many videos in your iPhone-iPad. Do you want to edit, perfect and share your own Olympic videos with others? Free online video editing tools certainly would be perfect, since it cost no money and fewer efforts. I’ve collected some of online video editors for people using mac. These 4 websites below will help you edit your Olympic videos better.

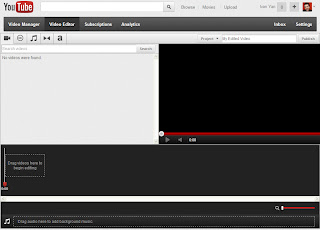
Top 1. YouTube video editor
YouTube video editor actually only offers some basic effects for video editing. But it is so convenient for people to edit videos that you’ve uploaded to YouTube. As far as I know, YouTube is developing many new features. From the 1080 P 3D effects, to face blurring effects, and even more, YouTube is trying to make your videos perfect.
YouTube video editor
Top 2. Adobe Premiere Express
Adobe Premiere Express makes it possible for you to edit your videos effortlessly-no experience necessary. A browser and the free adobe flash player (as almost all people may have installed one in their PC), are all you need. Recording, splitting, and trimming; adding music, photos, effects, etc. are all available.
Adobe
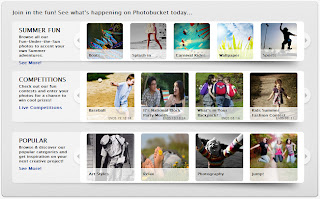
Top 3. Photobucket
Photobucket could be regarded as one of the most popular video and photo editing tool. Besides, it is also claimed to be the easiest way of editing videos and photos on your phone. With rich features, this editor is easy to operate. There are many themes to select. With it, you can upload your videos, photos to the website for sharing.
Photobucket
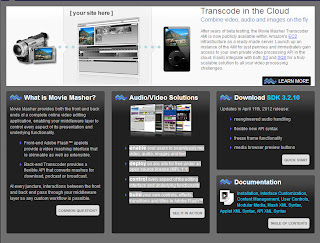
Top 4. Movie Masher
Movie Masher provides both the front and back ends of a complete online video editing application, enabling your middleware layer to control every aspect of its presentation and underlying functionality.
Movie Masher
Features:
  • enable your users to seamlessly mix video, audio, images and text
  • deploy on any site for free under an open source license (MPL 1.1)
  • control every aspect of the editing interface and underlying functionality
  • build your own controls, effects, transitions and titles in Adobe Flash™
Why not try some of them to edit your videos? You can upload your Olympic videos to YouTube for sharing. Enjoy the Olympic and enjoy your videos with these nice editors!

Monday, July 30, 2012

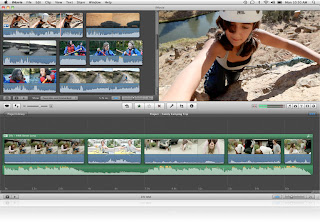
What's New in iMovie

  • Movie Trailers In a world of boring home videos, one feature made them fun.
  • All-New Audio Editing Exactly what every filmmaker dreams of. More control.
  • One-Step Effects With one click, home movies are suddenly so Hollywood.
  • People Finder iMovie finds the faces in your footage so you can choose your perfect cast.
  • Sports and News Themes Break the story and hype your team with graphics and effects just like on TV.
  • Your World Premiere Screen your movie on iPhone, iPad, iPod, Apple TV, Facebook, and YouTube.
Movie Trailers
iMovie-movie trailers
If you thought the movie was great, just wait until you see the trailer. Now you can make one yourself in iMovie ’11. Choose from 15 movie trailer templates in almost every genre: adventure, drama, romantic comedy, and more. Graphics and titles flash across the big (or small) screen. The legendary London Symphony Orchestra performs an epic original soundtrack. And suddenly your home video goes Hollywood. Movie trailers are easy to create. Just click your clips to drop them into the storyboard. Add character names and personalize the titles. Then iMovie works its magic. It trims your clips to fit and adds transitions, titles, and special effects. The result? A trailer tour de force.

All-New Audio Editing
iMovie-new audio editing
Go from indie filmmaker to master sound editor with new audio editing tools in iMovie. Sound effects, voiceover, and music — you control them all. iMovie shows you detailed audio waveforms for all your clips. They’re color coded, so you can see where the audio is overpowering. To adjust the audio levels of a clip or part of a clip, just drag the volume slider. To shorten or extend fades, drag the fade edges. As you make changes, waveforms update immediately so you always see what you hear. And the new single-row view shows you your entire movie project in one horizontal row, so it’s easier to preview and edit your soundtrack.

One-Step Effects
iMovie-one-step effects
A dog running in slow motion. A wedding ceremony sped up. Pee Wee baseball instant replays. Home videos are even more entertaining with visual effects, and you can make them happen with a click. Add jump cuts and flip effects perfectly timed to music. Transition parts of clips from color to black and white, sepia, or a dream haze. Choose a clip, choose from over 12 effects, and click to apply.

People Finder
iMovie-peoole finder
What’s a movie without a great cast? iMovie makes it easy to find your stars without digging through all your footage. By analyzing your video for faces, People Finder identifies the parts with people in them and tells you how many are in each scene. It also finds the close-ups, medium shots, or wide angles so it's easy to grab video clips as you need them. People Finder is great to use while you make movie trailers. You can quickly find the right shots and drop them into the movie trailer storyboard.

Sports and News Themes
iMovie-new themes
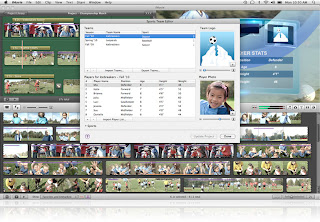
Today’s headlines: whatever you want them to be. Turn your video into a broadcast news segment complete with sophisticated graphics, sleek transitions, and hard-hitting titles you write yourself. The News theme is a fun way to announce a graduation or a new baby. Want to report real-life news? Share your story with CNN iReport directly from iMovie. With the Sports theme, you can turn a Pee Wee baseball game, a round of golf, or skateboarding at the park into sports video highlights. Add sports graphics and transitions. Choose from dynamic animated titles, such as game score, team face-off, and player stats. The Sports theme even includes a Sports Team Editor that seamlessly integrates your own player photos, rosters, statistics, and team logos into any Sports theme movie.

Your World Premiere
iMovie-your world premiere
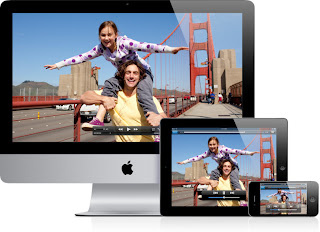
iMovie ’11 lets you view your movies in more ways and in more places. Enjoy them right in iMovie with high-resolution graphics enhanced for the Retina display on the new MacBook Pro. Export movies to iTunes and view them on your iPhone, iPad, iPod, or Apple TV. Share them with your friends on Facebook or premiere them with a YouTube or Vimeo audience. And publish newsworthy content to CNN iReport. When you export HD video at full 1080p resolution, whatever you share will stun everyone.

From apple

How to Make Your Own Olympic Videos?

One of the greatest events of this year-London 2012 Olympic Games has been in full swing these days. Whether for supporting their own countries or just for the sports spirit itself, sports fans won’t miss the chances of joining the games.

As the storm of Olympic reports, photos and videos sweep the internet; you can make your own Olympic videos from a different point of view to make it fun. Say, you can make videos of Olympic opening ceremony main torch lit methods. Not just for comparing, but also for a collection for Olympic history.

To make such a video you need a tool-Leawo Video Editor is recommended here. With videos or photos of Olympic Torch being downloaded as precondition, follow the steps below to make your own Olympic videos.

1.After the software being downloaded and installed, you can import videos or photos from computer folder, video/audio recorder or screencast.
input
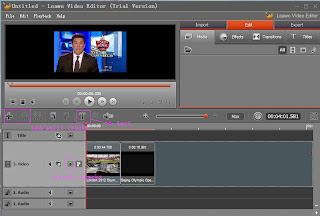
2.Edit video imported in the timeline panel using the customization options.
effects
  • Drag and drop to put your videos in order of year. In the timeline editing panel workspace, you can edit video, image, audio tracks and titles separately. Tracks adding or removing can be done accordingly and splitting tracks into two.
  • The “edit” bottom in the right corner allows effects of “effects” like color, style, etc. Drag and drop the effect upon the videos also works. “Transition” in “edit” bottom provides transition effects while you can add “text” there too.
effects
3.Edit your output settings, such as format, specifications, etc. Besides, you can even burn it to DVD or CD.
output
In spite of mixing videos together as a collection, Leawo Video Editor also can make slideshow with photos. The fact is that, sports fans can also use the photos of their favorite athlete’s photos to make a special slideshow, or a collection of mascots of slideshow. That will be interesting.
mascot

Sunday, July 29, 2012

iMovie to Edit Your iPhone Videos

  • Home for home video. 
home for home videos
Let the good times roll with all your video in one place.With iMovie, every video you’ve ever recorded is right in front of you, ready to roll. Grab the popcorn and enjoy the show.
  • Editing for everyone. 
Editing for everyone-imovieMaking a great movie from home video is easier than you think.
In just a few clicks, you can turn your home video into your favorite film.
  • Take movies further. 
Take movies further-imovieRefine every cut, edit audio, and fix shaky video.
Fine-tune every cut and transition, edit color and audio, and fix shaky video. iMovie gives you the controls you need to smooth out the rough parts — and there’s nothing rough about it.

1. Instant thumbs up.
Create a dream sequence. Speed things up. Slow it down. Make your movie more exciting with 19 video effects.
2. Sounds entertaining.
Muffle your voice or give it an echo. Adding audio effects to your video or voiceover is easier than it sounds.
  • Add a little Hollywood. 
Take movies further-imovieTurn your video into movie trailers, TV news segments, and more.
With one click, make epic movie trailers and create beyond-amazing effects. It’s your home video’s big break.

1. Adventure? Comedy? Drama? Choose from 15 movie trailer templates. Drop your clips in the storyboard. Personalize your titles. And your home video seems straight from Hollywood.
2. A theme tour de force. To make your movies even more entertaining, add one of seven themes including Photo Album, Bulletin Board, Scrapbook, and Filmstrip.
  • Now playing everywhere. 
Now playing everywhere-imovieScreen your movie online or watch it on your iPhone, iPad, iPod touch, or Apple TV.

Once you’ve finished your masterpiece, it’s time to share it. The fans, the critics, and the red carpet are ready and waiting.

A home theater premiere. Play your movie on the biggest screen in the house. With AirPlay, you can wirelessly stream your movie to your HDTV via Apple TV at up to 1080p resolution.

From apple

Free Video Editor-Kdelive

Kdelive is an open source of video editing software. This video editor can edit almost videos of every format through FFmpeg, which means formats namely as DV, HDV, mpeg, avi, mp4, mov, flv, ogg, wav, mp3, Quicktime, vorbis all can be supported. It also supports 4:3 and16:9 aspect ratios for PAL, NTSC and various HD standards, including HDV and AVCHD. Video can be output to DV devices, or burned to a DVD with chapters and a menu.

Some features in version 0.7 include:
Interface based on KDE's Oxygenstyle, capture from FireWire cameras, webcams and Video4Linux devices, grab video from your screen (screen capture), support for jog shuttle devices, independent rendering processes, interactive timeline operations, high definition editing, lossless formats and clip organization / location tools.

Audio effects: normalization, phase and pitch shifting, limiting, volume adjustment, reverb and equalization filters among others.

Video effects: options for masking, blue-screen, distortions, rotations, clour tools, blurring, obscuring and others.
Kdelive
Improvements in version 0.8:
User interface improves
Functions of proxy crip, audio monitor, HDMI output, added
Picture preview fixed
Frame by frame rotoscoping technology added
Perspective photo location
Widget layout
Animation effects in dark condition, audio frequency and light spectrum, enhanced
Kdelive
Till now, the 0.9.2 version has been released; I will collect more information to have a introduction in my blog.

Friday, July 27, 2012

How to Make Your how-to Videos Reach Audience

Occasionally, we like to share stories of how businesses have achieved success on YouTube. Today we will look at examples of using how-to videos to reach the right customers online.

These are just a few how-to focused searches being typed into YouTube by ambitious do-it-yourselfers this summer. Many savvy business have realized that YouTube is not just an entertainment hub - it is also an educational forum for eager learners. Here are a few tips from the pros on creating how-to content most relevant to your audience:

1. Keep things simple. Let’s take a look at Lowe's. The second-largest home improvement retailer worldwide simplifies DIY projects with hundreds of how-to YouTube videos in the form of “video snacks.” These short and sweet informational videos satisfy DIY-ers’ cravings to complete at-home projects by homing in on specific steps of the process. So if you are building a fence, you can start with a video about the layout and digging post holes and follow the series to the final step, attaching the gate.
2. Identify your audience. Know who you’re trying to reach and then focus on topics you think they’re most interested in watching. ModCloth, an online-only indie and vintage-inspired clothing retailer, has a clear understanding of the “ModCloth girl” — a girl who is into travel, art, glitter, and DIY projects of course. They create how-to videos tailored to the ModCloth girl lifestyle, whether it’s how to style a headband or how to pack for the campground.
What can you teach new potential customers? Join our conversation on the YouTube for marketers Google+ page, and if you’re looking to get started with video advertising on YouTube, sign up for Google AdWords for video, which is the easiest way to drive viewers to your videos.

Source from youtube-global.blogspot

Thursday, July 26, 2012

Top 3 iOS Video Editor

Apple’s computing infrastructure has long been aimed at the creative professional, with emphasis on photo and video editing featuring prominently in marketing material past and present. The only problem with this is that industry-leading software like Adobe Premier, After Effects and Apple’s own Final Cut series isn’t cheap. In fact, it’s very expensive. If you’re already out of pocket from purchasing a rather expensive Mac then you’ll likely want some financial relief in the form of free software. While nothing is going to match the premium might of Adobe and Apple’s in-house software, there are a few free video editing applications to sink your teeth into.
iMovie
If you’ve just bought your first Mac then you might not have realised that it already comes with a basic video editor called iMovie. This is Apple’s own software and comes as part of the iLife suite. While you won’t necessarily be cutting up the next Hollywood blockbuster using iMovie, it’s a capable video editor for small projects.
iMovieFor personal use, iMovie offers an easy introduction to video editing with support for face recognition, themes, easy to use effects, a simplistic timeline view and built in sounds and animations. It will leave you hungry for more if you’re after a powerful video editing solution, but then again you’ll be hard pressed to find an easier way to bring your moving images together into one professional looking production.
Blender
At the opposite end of the spectrum in terms of user friendliness and raw power is Blender, an application usually associated with 3D modelling and compositing that’s been used in some pretty high profile productions.
Blender

We’ve written about Blender before at MakeUseOf, though with a focus on the 3D modelling aspect with only a brief mention of Blender’s potential as a non-linear video editor. The open source powerhouse might take some getting used to but with a few tutorials and some practice you’ll be surprised at what you can achieve. Here is an excellent site with a heap of tutorials for those getting started with Blender.
Kdenlive
Kdenlive
Better known for its compatibility with Linux (of which it’s one of the better video editors), Kdenlive plays nicely on OS X thanks to the help of MacPorts. The project is very much alive, with a March 2012 donation drive exceeding expectations allowing the developer to work on the project for two solid months.

From makeuseof

Tuesday, July 24, 2012

Current YouTube Video Editor

YouTube
The latest YouTube editor function-face blurring effect has enjoyed favor. A while back, Matt wrote an article about the 2010 YouTube Video Editor, and although it doesn’t seem that long ago, a lot has changed. Back then, it had a few basic features, but in all honesty, it just wasn’t really that functional. However, two years later, it’s high time to revisit the video web app. Everyone deserves a second chance, right?

First off, I’ll say this – the YouTube video editor is functional, to some extent. As with anything, there are different aspects when it comes to hitting a target audience, so let’s just say you won’t be cutting the next Academy Award winner (or maybe you’re one of those avant-garde artists who will use nothing but an iPhone and the YouTube Video Editor to create the most revolutionary work ever made). However, the app is definitely worth checking out regardless of whether you plan on using it regularly or not.

The Editor
Back when we first took a look at the YouTube Video Editor, we saw that it included some standard functions: cropping video, video splicing (a must), and Audioswap. However, the new video editor does a little bit more, but before I begin, I just want to just mention that splicing is about the only thing that is the same. Realistically, you can’t change that much.
clips splicing
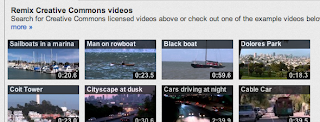
With the editor, you can put any clips you have uploaded into one big video. This is ideal for family vacation videos taken with iPhones. If you are already uploading goofy little clips of your family online, why not put them in one home movie? Seems reasonable to me. Additionally, there is a Creative Commons video library so that you can insert stock footage into your own videos. I’m not entirely sure what you would use this for, but I’m sure you could make some nifty stuff with it.
titles
Other stuff that you can use (that would be found on any standard movie editor) include actual titles and some (corny) transitions. Furthermore, the Audioswap song selection is still around, but it looks a lot more user-friendly.
transitions
The Enhancements
What was lacking with the earlier version of the YouTube Video Editor were Enhancements. Although not actually part of the editor, the Enhancement section of YouTube provides several ways to alter the look of your video or adjust the audio. Although they aren’t the most professional tools, they are still pretty great for what they are.
enhancement
The Enhancement section can be found in the video manager section of your channel through any of your videos, and its content is divided into three categories: quick fix, effects, and audio. The quick fix includes basic adjustments for issues such as contrast and even saturation. As for the effects, there are many different methods of color grading available. Also, the audio is pretty much the same as the one you would find in the editor.

All in all, the one thing that really stands out with me concerning these Enhancements is the implementations of a video stabilizer. As you may know, a lot of the video content on YouTube is shot on tiny, handheld, shaky smartphones. With the stabilizer, there is actually a chance of getting some smooth video. Just pop your shaky video into the stabilizer, and YouTube should do the rest.

From makeuseof

Monday, July 23, 2012

8 Steps to DIY Your Greeting Cards

If you're looking to create a more personal greeting card and the thought of glue sticks and glitter scares you, try your hand at a video card. With Windows Live Movie Maker—which you can download for free here—you can create and share a great-looking video card out of your favorite photos in just a few simple steps.

You can make cards for birthdays, to share vacation pics, or to say “thank you.” Then take advantage of the easy-to-use tools that make it a snap to edit, add transitions, and music. When you're done, upload it straight to Windows Live SkyDrive, YouTube, or Facebook. Sound good? Let's get started!


1. Open Windows Live Movie Maker
Open Windows Live Movie Maker by clicking the Start button Picture of the Start button, typing Movie Maker into the search box, and then selecting it from the list of results.

Tip: If you've already been editing those photos and still have Windows Live Photo Gallery open, here's a shortcut: Select the images you want to use, click the Create tab, and then click Movie. (You can skip the next step.)

2. Add your photos
Now, it's time to add the photos you want to share. Just click the white box on the right where it says Click here to browse for videos and photos. Select all your files by holding down the Ctrl key and pressing A, or select just certain files by holding down the Ctrl key while clicking the photos and videos you want to include. Or just drag your photos into the box. When you've selected the images you want, click OK.

3. Add a title slide
movie maker-add title slide
In the Home tab, click Title to add a title slide to your video card. Name your card whatever you want. Get creative!

4. Get it all in order
movie maker-in order
Now that your title and credit slides have been added, it's time to make sure everything is in the right order. Move the title slide to the very beginning of the movie and the credit slide to the end (if it's not already there) by dragging it to the right place. This will frame up the beginning and end of your video card. And if you want your photos to appear in a particular order, you can arrange them in the same way.

5. Choose a theme and add music
Be sure to take advantage of the Windows Live Movie Maker AutoMovie themes, which automatically build in fun visual effects and transitions. To change your theme, navigate to the Home tab and select a different theme in the AutoMovie theme section. (Hover over a theme for a preview.) After you click a new theme, you'll be prompted to add music.

Tip: As you play around with themes, you may notice that a black screen or extra title screen sometimes appears in your picture sequence. Go ahead and delete any slides you don't want.

6. Include additional captions for each photo
movie maker-additional captions
Adding text to your video card is a snap (and you don't have to worry about penmanship). Click the photo you want to add text to, and then click Caption on the Home tab. You'll see a text box appear on the photo—just type in your caption. Then, if you want, you can change your font style, adjust size and color, and move the text box.

7. Don't forget credits!
movie maker-credits
Rolling credits can put the finishing touches on your card—so if you want credits to appear, make sure you choose a theme that includes them. Then, simply double-click the little pink box that appears under each credit slide and fill out the text box that appears in the picture.

8. Easily share your video card
movie maker-sharing
You're done—that was easy, right? Sharing your video is just as simple. To upload to sites like Facebook, Windows Live SkyDrive, and YouTube, just click the appropriate icon in the Share group on the Home tab, and then follow the instructions. To burn your masterpiece onto a DVD that you can send in the mail, click Save movie, and then Burn a DVD.

So there you have it: a fun, digital alternative to the traditional greeting card.
From windows.microsoft

Sunday, July 22, 2012

‘Ripping Music From Videos is Legal’ Lawyers Say

Remember the good ol’ days when you’d tape your favourite song off the radio? Or get up early to grab a VHS copy of your favourite music video?

Those days are long behind us now, but a student is using the example as a legal precedent in a battle with internet giant YouTube.
YouTube
Mashable reports that 21-year-old computer science student, Philip Matesanz of Germany, believes that users of YouTube should be allowed to convert its video content into downloadable .mp3s. Which his website, youtube-mp3.org, allows its one million strong userbase to do daily.

Matesanz was issued a cease-and-desist from YouTube and its owners, Google, over his website claiming that his site’s ability to rip audio content is considered a breach of YouTube’s terms of service as well as of user copyright. But in his legal research, Matesanz’ lawyers have uncovered a legal precedent.

They site a historical parallel between the video uploaded website and public broadcasters like radio and television, and that make a private copy of such a public broadcast is perfectly legal – only the delivery method has changed. Google and YouTube disagree, saying that its a violation of user rights.

In response to Google’s cease-and-desist, Matesanz has also put together an online petition for his website, asking his users to support and defend his website based on the legal precedent. Its already gained nearly 800,000 signatures in the short two weeks its been put together.

The petition, written by Matesanz, reads: “For decades people were allowed to take a private copy of a public broadcast. You could record the radio program with a cassette recorder or make a copy of your favorite movie by using a video recorder. All these techniques have been opposed heavily in its early years by the big media companies who didn’t want the public to have such technology.”

“Several years later history is about to repeat,” writes Matesanz, “Google has teamed up with the RIAA to make the same claims against all sorts of online recording tools for their 21th century broadcasting service. Google is taking action against nearly every service that enables its users to create a private copy of a public YouTube broadcast while the RIAA is threatening news media like CNet for promoting such software.”

Matesanz also proposes that YouTube’s cease-and-desist letter is accusing him of a technological process his site does not use. The terms or service of YouTube’s personal conditions prohibits users from using its API downloading content as opposed to streaming it. However, Matesanz claims his site doesn’t gather data through the internal services, but external programming.

Regardless, there’s clearly a demand for YouTube and Google to provide a service that allows their uses to access audio content in downloadable formats (like .mp3) for offline use. Probably because the video website makes most of its money through advertising, that streams before content.

However, there may be another reason for Google’s cease-and-desist letter to youtube-mp3.org, it’s a market they want to corner themselves…

Last month, Google introduced a way to watch certain content while offline in in its YouTube Android app, indicating that the internet giant is looking at ways of combating the influx of streaming services, who allow access to music content that browsers typically went to YouTube for.

It’s another interesting legal case that has sprung up as a result of the push for greater media dissemination and the level of control that’s wrestled between content providers and what consumers and users deem what they can do with that content.

Similarly, the Canadian Supreme Court ruled in favour of telecommunication companies that scrapped additional r0yalties for musicians, writers and publishers for music used in videogames and movies; essentially good news for internet service providers and bad news for music-makers and their copyright.

Music and copyright infringement is an issue that won’t go away anytime soon, particularly as digital services endeavour to give consumers more access to music without considering the implications of it use. It’s an issue that marred the rise of musical piracy, leading to ugly ‘label versus individual’ cases – such as when a US High Court refused to reduce a student’s $US 675,000 fine for illegally downloading 30 songs. While Japan recently changed their laws to severely punish individuals who breach copyright infringement.

In the case of Matesanz and his .mp3 conversion website, it’s an issue of control and definition, with a pleas in his petition for “Google to break their silence and participate in an open and fair discussion with the intention to find a solution that suits the needs of the users.”
From tonedeaf

Thursday, July 19, 2012

Video Sharing by Windows Movie Maker

DVD
  • To publish and burn a movie to a DVD
To publish and burn a movie to a DVD, you must have Windows DVD Maker, which is included in Windows Vista Ultimate and Windows Vista Home Premium. You also need a DVD burner.
  1. Insert a blank recordable or rewritable DVD into your DVD burner.
  2. Open a project in Windows Movie Maker.
  3. Click File, and then click Publish Movie.
  4. Click DVD, and then click Next. Windows DVD Maker opens.
  5. Complete the steps to create a DVD using Windows DVD Maker.
  • To publish and burn a movie to a recordable CD

  1. Insert a blank recordable CD or a rewriteable CD into your CD burner.
  2. Click File, and then click Publish Movie.
  3. Click Recordable CD, and then click Next.
  4. In the File name box, type a name for your movie.
  5. In the CD Name box, type a name for the CD, and then click Next.
  6. Choose the settings you want to use to publish your movie, and then click Publish.
  7. To publish and burn the movie to another recordable CD, select the Publish this movie to another recordable CD check box, and then click Next. Replace the recordable CD with another recordable CD, and then repeat steps 4 through 6.
from windows

Face Blurring YouTube-New Video Editing Effects

After releasing a basic video editing tool last year, earlier this year in March 2012 YouTube start something new. YouTube planned to improve the video quality automatically. Users can edit and revise motion pictures and colors. Preview before you decide to save the changes, also you can undo the changes if you’re not satisfied.
face blurring

That’s what YouTube announced to do months ago. Recently in July this year, a new tool of video editing from YouTube will also appear soon. The new function-facial blurring tool will let anyone using the site’s web video editor blur the identities of people existing in the videos. It is quite easy to achieve the effects simply by clicking “enhancements” tab in the video editor and apply filter.

Google warns that as face blurring is an “emerging technology”, it is far away from perfect. Google has also published additional guidelines to help people who upload sensitive footage on the website. To some extent, this will be better safe than sorry. Except for faces, other factors such as: names, car license plates, clothes, and other things that may disclose the men’s identity in the videos.

“YouTube is proud to be a destination where people worldwide come to share their stories, including activists. Along with efforts like the Human Rights Channel and Citizentube that curate these voices, we hope that the new technologies we’re rolling out will facilitate the sharing of even more stories on our platform.” YouTube blog wrote.

Such kind of tool applied in video websites is about to be the first time made by YouTube. According to the international human rights organization WITNESS’ Cameras Everywhere report,“No video-sharing site or hardware manufacturer currently offers users the option to blur faces or protect identity.”So far, no other video sharing services or websites provides such features.

Once put into practice, most users showed that it really is a cool tool. Well, what’s your opinion?

Wednesday, July 18, 2012

How to Copy Your Custom Setting in Windows Movie Maker

Before this we've talked about how to do custom setting in Windows Movie Maker. And after you've made your own settings, you can follow the steps below to save it:
  • In Windows Media Profile Editor, click Save and Close.
  • Click the File name box, and then type a file name.
  • Navigate to the Documents folder.
  • Click Save.
    windows movie maker
    In addition, you can copy your own custom settings. To copy the custom setting to the correct Movie Maker folder that appears under Program Files, you need to be logged into Windows as an administrator or as a member of the Administrators group.

    1.Click the Start button, and then click Computer.
    2.In Computer, navigate to the following folder location: :\Program Files\Movie Maker\Shared where SystemDrive is the drive letter on which Windows Vista is installed.
    3.Click Organize, and then click New Folder.
    4.If a Destination Folder Access Denied dialog displays, click Continue.
    5.In the User Account Control dialog box, click Continue.
    6.Type Profiles for the folder name, and then press ENTER.
    7.If another Destination Folder Access Denied dialog box displays, click Continue.
    8.In the resulting User Account Control dialog box, click Continue.
    9.In Computer, navigate to your Documents folder where you saved the custom setting, click the custom setting file (which has a .prx file name extension), click Organize, and then click Copy.
    10.Navigate to the following folder: :\Program Files\Movie Maker\Shared\Profiles.
    11. Click Organize, and then click Paste.
    12. If another Destination Folder Access Denied dialog box displays, click Continue.
    13.In the User Account Control dialog box, click Continue. 


    From windows.microsoft

    Tuesday, July 17, 2012

    How to Create Custom Settings in Windows Movie Maker

    microsoft
    1. In Windows Media Profile Editor, click the Name box, and then type a name for your custom setting.
    2. This setting name appears in the More settings box in Publish Movie.
    3. Select the Audio check box, and then click either CBR or Quality VBR from the drop-down box.
    4. In the Codec box for audio, click Windows Media Audio 9.x.
    5. Select the Video check box, and then click either CBR or Quality VBR from the drop-down box.
    6. In the Codec box for video, click Windows Media Video 9.
    7. Some codecs might not be supported in Windows Movie Maker.
    8. If necessary, clear the Allow interlace processing and Allow nonsquare pixel output check boxes.
    9. In the Target bit rate area, click Add. In the resulting Bit rate box, type a value for the bit rate followed by K for kilobits or M for megabits, and then click OK.
    10. The number you enter is the total bit rate. If you are creating a quality-based VBR setting, you will not be prompted to type a bit rate.
    11. On the new tab that displays, click the Video size box, and then enter a display size (width x height) for your video.
    From windows.microsoft

    Monday, July 16, 2012

    Customized Movie Settings for Windows Movie Maker

    windows movie maker
    Windows Movie Maker has many settings that you can choose to use when publishing your movie. However, you can also create your own custom settings to use when publishing your movie. The settings you choose when publishing a movie determine the quality and size of the final published movie file.

    To create a custom setting, you must first install Windows Media Profile Editor, which is installed with Windows Media Encoder 9 Series. You can download and install Windows Media Encoder 9 Series from the Microsoft website.
    windows movie maker

    The following list contains tips for creating valid custom settings by using Windows Media Profile Editor. By following these tips, you can ensure that the custom setting that you create is valid and usable in Windows Movie Maker.

    Only choose CBR or Quality VBR encoding modes in Windows Media Profile Editor. Windows Movie Maker supports constant bit rate (CBR) or quality-based variable bit rate (Quality VBR) encoding modes only. Therefore, when creating custom settings for Windows Movie Maker, you must choose one of these two encoding modes. Two-pass encoding cannot be used in Windows Movie Maker. For detail information about encoding modes, see Windows Media Profile Editor Help.

    Make sure that the custom setting contains one audio stream or one audio stream and one video stream. In Windows Movie Maker, a custom setting must contain either one audio stream or one audio stream and one video stream. Custom settings that contain only a video stream with no audio stream cannot be used in Windows Movie Maker.

    Clear the Script check box in Windows Media Profile Editor. Windows Movie Maker supports audio and video streams only. Other types of streams, such as scripts, are not supported in Windows Movie Maker. To ensure that you can use your custom setting in Windows Movie Maker, make sure that the Script check box is cleared when you save your custom setting in Windows Media Profile Editor.

    Clear the Same as video input check box in Windows Media Profile Editor. To ensure that you can use your custom setting in Windows Movie Maker, clear the Same as video input check box on the bit rate tab in Windows Media Profile Editor.

    The audio stream cannot contain more than two audio channels. Custom settings that contain audio streams with more than two channels cannot be used in Windows Movie Maker.
    from windows.microsoft

    Sunday, July 15, 2012

    Personalize Your Nostalgic Videos with Timeline Movie Maker

    timeline movie maker
    Released in January this year, Timeline Movie Maker embraced with much favor and love. It help people recall of the past memories of happiness or sadness. Timeline will witness and memorize your footprints of life.
    introducing timeline

    In order to promote the Timeline version homepage, Facebook and Definition 6 developed a personalized and nostalgic movie website experience service together. Users of Facebook can easily log in with their Facebook account. Then they can estimate what people and friends have shared on the website, after analyzing, making a short movie which is personalized and nostalgic, and share with others. Pitifully, it allows no downloading of such movies temporarily.
    timeline movie maker

    Enter the website of timeline movie maker, click the green button “make your movie” to start analysis of the content in the website, before long you can view and appreciate the movie. When the movie finished, movie background music can be edited as you like. In addition, photos can be adjusted by yourself accordingly. Then you can share with your families and friends. Timeline Movie Maker gives users a brand new mode to tell the story in your movies.

    Equip Your iPhone Videos with iMovie

    Apple’s own home movie editing app has been around for a while now, and initial reviews weren’t too favourable. A couple of updates later, however, and iMovie seems to have improved as a basic editing tool. It’s not for everyone – if you’re making a music video, feature-length production or documentary style film you will probably want to use a desktop app. For short films and productions though, iMovie is a remarkably fast way of editing together your footage.
    imovie

    The ability to export your project to iMovie for Mac is awesome, allowing you to play around with footage on the go and then pick it up when you get home. There are also a plethora of effects, sound effects, musical scores and the ability to build cinematic trailers from your footage too.(from makeuseof)

    Below is a video from YouTube about how to add and edit iMovie Effects with iMovie.Wathch and leran, enjoy it!
    Troubleshooting: - Make sure you have NOT checked "optimize video" when importing
    - If you are having trouble with the Picture in Picture, check out my response video below
    - Ensure your Picture in Picture setting is not set to "fit in frame" PRIOR to inserting your
    footage
    - If your footage inserts transparent and looks right when you scrub through it, but doesn't play in real time in iMovie, don't worry, it will work fine after export
    - The most common issue is that the footage isn't actually pre-keyed
    from YouTube

    Thursday, July 12, 2012

    Edit Your iPhone Videos with this App

    Shooting a film on an iPhone might not seem like the smartest idea, but for many it's a viable option for capturing decent HD quality video on the move. Monday’s Stuff to Watch featured a number of productions created using the iPhone, a few specialised apps and some extras which can really make the difference.

    Today we’ll be exploring the iPhone filmmakers’ toolbox, more specifically the apps that can help you get the most of your phone’s capabilities as a video recorder, processor and editor. Tomorrow we’ll be taking a closer look at accessories, DIY kit and techniques for producing top-notch video on your smartphone, so be sure to check back.
    iPhone 4S
    The iPhone 4S, being the latest and greatest, will provide a superior video experience than the iPhone 4. Just so we’re straight, the iPhone 4 shoots decent raw 720p video, while the iPhone 4S can capture 1080p video. The iPhone 4S also has an inbuilt image stabiliser to reduce hand shake, and low light performance is noticeably better than its predecessor.

    That said the iPhone 4 still provides good 720p HD video, and the lack of an image stabiliser won’t make too much of a difference with the right tools at your disposal. If you are considering using an iPhone to shoot your short, film, documentary or music video, then battery life and storage space are going to be of utmost concern. It goes without saying that you should probably dump existing footage and pictures to your Mac or PC, for the maximum shooting time possible.

    FiLMiC Pro
    Probably the most fully-featured iPhone video app, FiLMiC Pro lets you customise a myriad of options from a thumb-optimised interface for the best video possible. In addition to three separate modes for focus and exposure (including the ability to expose for one area and focus on another), FiLMiC Pro allows you to specify your own frame rate, including 24p (US) and 25p (European) film standards and user-defined video bitrate for unsurpassed authenticity.

    The app also provides control over the resolution of the resulting video and framing guide overlays in 4:3, 16:9 and 2:35.1. An on-screen audio meter ensures you can see whether your sound is too loud or quiet and color bars and a film-style clapper finish off this motion picture masterpiece.

    It’s not perfect, the iPhone drops frames occasionally (especially in low light situations) and 24p might end up at around 18 frames at times, but then again it offers such a leap in functionality over the plain old Camera app that the $3.99 seems almost too cheap considering the resulting footage. Check out the demo (in HD), below.
    from makeuseof

    Audio Effects to Optimize Your Video with Windows Live Movie Maker

    After you've made your own movies with Windows Live Movie Maker, you would like to edit its audio and video effects as well in order to perfect it.

    Add a movie soundtrack
    Click Add Music on the Home tab on the ribbon. Select the song of your choice, and click the Open button. Once you’ve added music, the Music Tools-Options tab now becomes available. Note: AutoMovie asks if you would like to add a soundtrack to your movie, if you select no you can always add one later.

    If you want to split a song at a particular point in your storyboard, select the photo or video before which you’d like the split. Click Split on the Music Tools-Options tab on the ribbon. Then drag and move the song track anywhere on the storyboard that you’d like.
    audio editing
    If you’d like to add more than one song to your movie, select the photo or video where you’d like to add the new song.Click the down arrow in the lower-right corner of the Add music button on the Home tab to access the drop-down menu. Click Add music at a current point. Select another song.
    add music
    One thing to note, Windows Live Movie Maker only allows you to have one soundtrack playing at a time. This means you cannot have the audio from your movie, a soundtrack, and a narration track all at once. If you want to add narration and have a soundtrack along with the audio from your movie in the background, there are some steps to accomplishing that task.

    Adding narration (assuming your movie maker project has the content in the proper order):

    •Click Start in Windows Vista or Windows 7 and open up Sound Recorder in the Accessories folder.
    •With your Windows Live Movie Maker project open in the background, click Start Recording in Sound Recorder and immediately click the Play control in your Movie Maker project.
    •Narrate your movie. If you mess up, stop the playback of your Movie Maker project, click Stop Recording in Sound Recorder (don’t save the file) and start again.
    •When you finish narrating, click Stop Recording in Sound Recorder and save the audio file in a location on your computer that is easy for you to locate.
    •Go back to Windows Live Movie Maker, find the point in the Storyboard timeline that you would like to add your narration (from the beginning or at a current point), and click Add music below the music note in the Home tab. Navigate to your audio file and add it to your project.
    •You can edit your narrative track by clicking the Music Tools tab in the ribbon. Start by aligning the audio track to the place in your movie you want the narration to start. Then start playing your movie. The audio and video is probably not synced, for the moment do not pay attention to the video, listen for the point in the narration where you want the audio to start and click Set Start Point. This adjusts the audio so that the start point begins where you originally placed the audio track, effectively syncing your audio with your movie.

    Adding a soundtrack and narration 
    •Make your movie as you would (using AutoMovie or manually) and add a soundtrack. Export the movie (depending on your resolution, we always recommend 1080p).
    •Once your movie is exported and saved, open a new project in Windows Live Movie Maker.
    •Click Add videos and photos; add the recently exported movie.
    •Click Add music. Follow the steps above to add a narrative track.
    •If you need to adjust audio levels, click Audio mix in the Home tab to make the movie or the audio track (narrative in this case) louder than one another by sliding the bar left or right.

    Add titles, captions, and credits
    Select the photo or video before which you’d to see the title screen. Click the Title button on the Home tab of the ribbon. Enter your movie title in the area that states.

    You may change your title’s font, size, color, effects, and more using the Text Tools-Format tab on the ribbon. You may also use text duration to determine how many seconds you’d like the title to appear.
    text tools
    You can also add captions to any part of your movie. Play the movie and at the desired point, click the Caption button on the Home tab of the ribbon. You can edit how the caption appears, enters the screen, and more using the Text Tools-Format tab.

    At the end of your movie, you can give yourself some credit by adding credits. Click the last photo or video in the storyboard. Click the Credits button on the Home tab of the ribbon. You can edit how the credits appear, enter the screen, and more using the Text Tools-Format tab.

    After all steps, you can share your own movies with your friends.
    share your movie
    From microsoft